Introduction
AWS EC2 (Amazon Elastic Compute Cloud) is a cloud computing service that allows users to launch and manage virtual servers, also known as instances, in the cloud. With EC2, users can create scalable computing resources that can be quickly launched and managed without the need for physical hardware. In this article, we will discuss how to launch an AWS EC2 instance.
Prerequisites
- An account in AWS and logged into the AWS console
- Ensure that you have EC2 access in the AWS Account if you are using an account created by your organization.
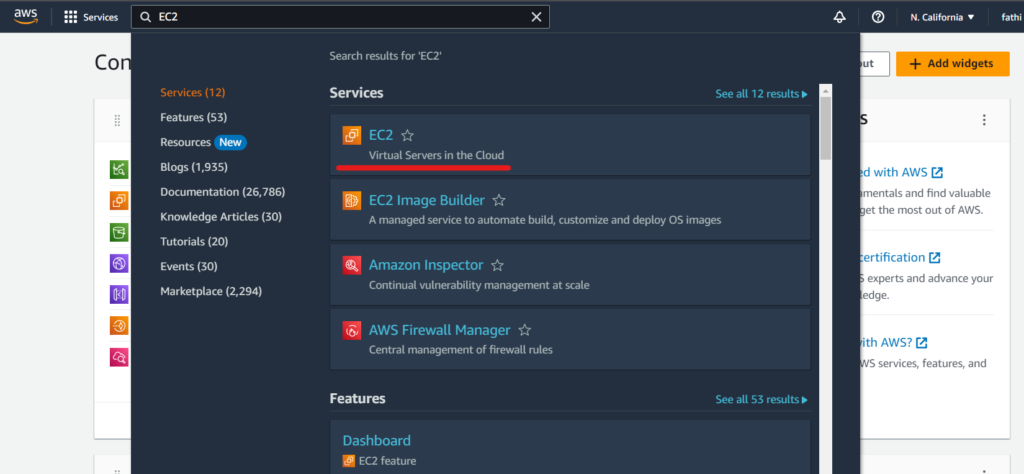
Step 1: Choose the EC2 Service
Once you are signed in to the AWS Management Console, click on the EC2 service. You can find the EC2 service by searching for it in the search bar or by clicking on the “Compute” section in the AWS Console.
After entering EC2 click on Lunch Instance . Enter your instance Name as you want.
Step 2: Choose an Amazon Machine Image (AMI)
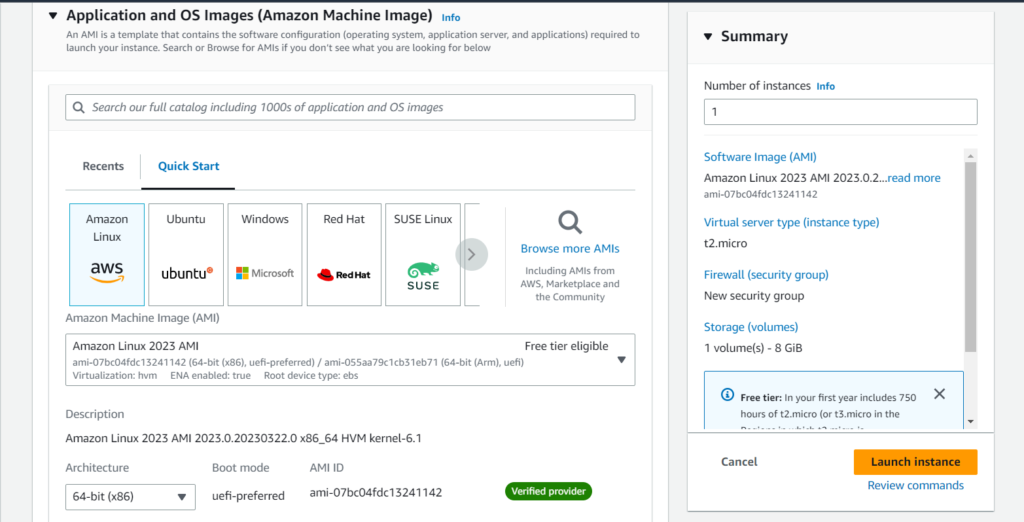
Before launching an EC2 instance, you need to choose an Amazon Machine Image (AMI) to use as the foundation for your instance. The AMI is a pre-configured image that contains an operating system, applications, and other necessary software. AWS offers a wide range of AMIs to choose from, including those that are optimized for specific workloads like web servers, databases, and machine learning.
Step 3: Choose an Instance Type
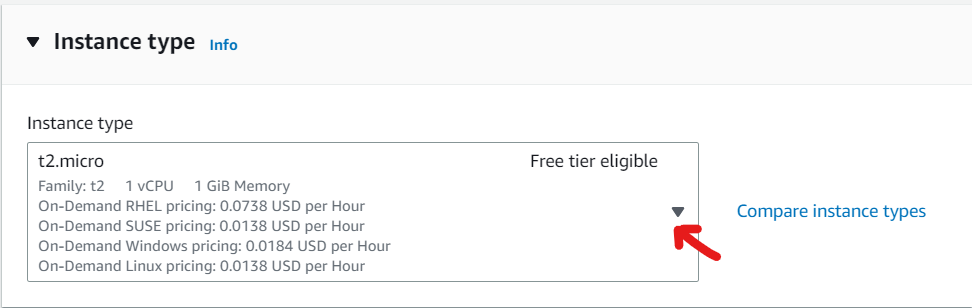
After selecting an AMI, you will need to choose an instance type. The instance type determines the computing resources, including CPU, memory, storage, and networking capacity, that will be available to your instance. They offers a variety of instance types to choose including general-purpose, compute-optimized, memory-optimized, and storage-optimized instances.
Step 4: Create a Key Pair
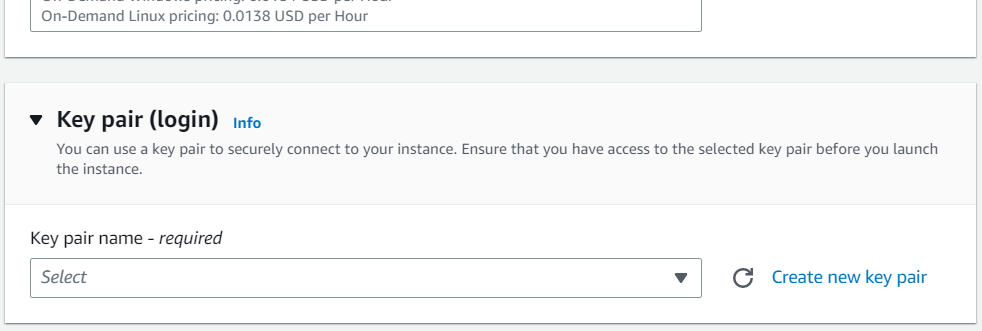
Before you can access your EC2 instance, you will need to create a key pair. A key pair is a set of public and private keys that are used to securely access your instance. By clicking on Create new key pair it will popup key pair creation information
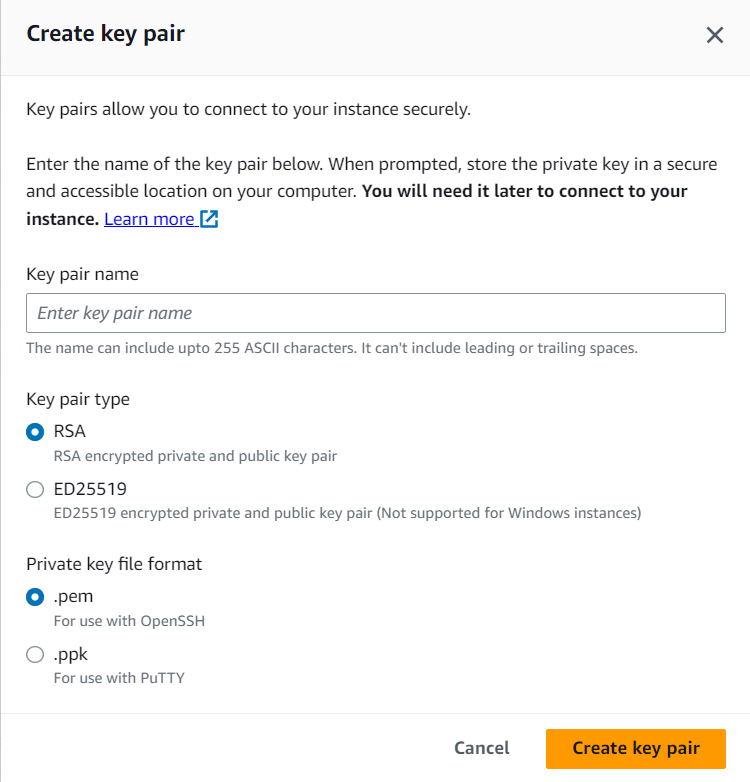
Choose the key file format you want, As I use PuTTY to connect my instance I always choose .ppk format. See how to connect EC2 instance (linux) from PuTTY.
Step 5: Configure Instance Details
In this step, you can configure additional instance details, including the number of instances you want to launch, network settings, and storage options. You can also configure security groups to control inbound and outbound traffic to your instances.
Step 6: Review and Launch
After configuring your instance details, you will need to review your settings and make sure everything is correct. Once you are satisfied with your settings, you can click on the “Launch instance” button to launch your instance.
Connect to Your Instance
Once your instance is launched, you can connect to it using SSH or RDP, depending on the operating system you chose. You will need to use your key pair to securely connect to your instance.
Conclusion
launching an AWS EC2 instance is a straightforward process. By following the above steps, you can quickly create scalable computing resources in the cloud that can be easily managed and customized to your specific needs.